Animation in an Angular app
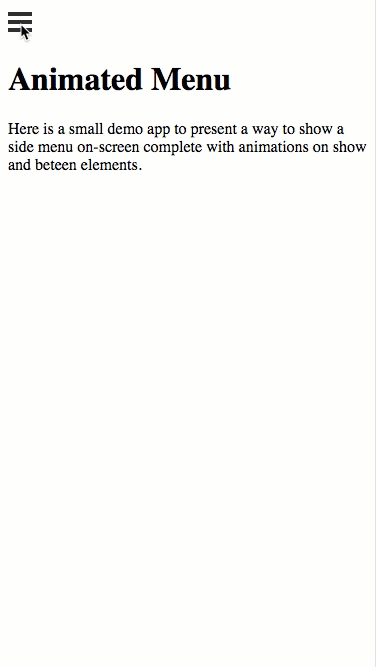
Animations providing they are done right are an essential part of a good UX. Although CSS3 provides a rich animation library to suit most needs, Angular enriches this with its own api to provide a extensive array of effects.
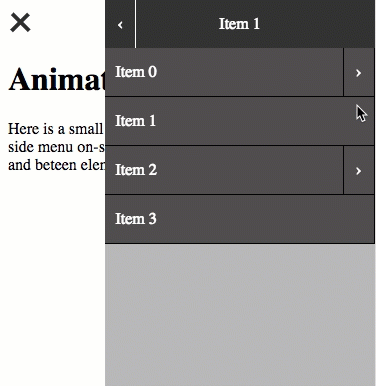
Here is a demonstration of how you can use both Angular and CSS animations to animate a hamburger menu containing a dynamic list of menu items. This demo concentrates more on animations and therefore details on how the dynamic items are created won't be elaborated on here.
This post shows a lot of code-snippets which may be hard to follow in isolation. I recommend downloading the full sample project from GitHub and following the code within the context of an Angular application. The source can be found here: GitHub
Using Angular to animate the open and close of the drawer
Angular has a variety of ways in which you can trigger animations, for this example we're going to use Animation States to initiate the animation.
Before using animations in Angular, you need to declare a couple of modules that allow the animation declarations to be understood properly:
app.module.ts
import { BrowserModule } from '@angular/platform-browser';
import { BrowserAnimationsModule } from '@angular/platform-browser/animations';

@NgModule({
  imports: [ BrowserModule, BrowserAnimationsModule ],
  // ... more stuff ...
})
export class AppModule { }
Next, we'll define the animations in the component decorator of the main page:
home.component.ts
import { Component } from "@angular/core";
import { trigger, state, style, transition, animate } from "@angular/animations";

@Component({
    selector: "app-home",
    templateUrl: "./home.component.html",
    styleUrls: ["./home.component.scss"],
    animations: [
        trigger('slideInOut',[
            state('in', style({
                transform: 'translate3d(0,0,0)'
            })),
            state('out', style({
                transform: 'translate3d(100%,0,0)'
            })),
            transition('in => out', animate('400ms ease-in-out')),
            transition('out => in', animate('400ms ease-in-out'))
        ])
    ]
})
export class HomeComponent { }
Here we define a trigger called slideInOut and then add a couple of object states and define the transitions between those states.
Next we'll flesh out the component class, adding a boolean property to store whether the menu is open or not, a getter property to convert that to a state that the child component will be bound to, and a function that will allow us to toggle the boolean.
home.component.ts
export class HomeComponent {
    public isMenuOpen = false;

    get currentMenuState(): string{
        return this.isMenuOpen ? 'in' : 'out';
    }

    public toggleMenu(): void {
        this.isMenuOpen = !this.isMenuOpen;
    }
}
Next we need to hook up the the animation in the page's HTML. Here we have a toggle button whose click event is bound to the component function, and a child component which holds our menu.
home.component.html
<div>
    <div class="menu-toggle"
        (click)="toggleMenu()">
        <div class="bar bar1"></div>
        <div class="bar bar2"></div>
        <div class="bar bar3"></div>
    </div>

    ...
</div>

<app-menu-container [@slideInOut]="currentMenuState"></app-menu-container>
The key detail to note here is [@slideInOut]="currentMenuState" this binds the animation to the child component using the trigger name and gets the current state value from the getter property we declared in the component's class.
Clicking on the hamburger button should ease the menu in from the right and

Hooking into animation events
Angular also exposes callbacks on its animations so you can call functions when an animation starts or once it's completed (to reset fields, state, etc.).
The code below utilizes , we're binding to the animations done callback so that we can reset the underlying menu to page one. We don't want to trigger this as soon as the use clicks close, as it will cause the UX to look a bit odd.
home.component.ts
export class HomeComponent {
	...
	@ViewChild('menuContainer') menuContainer: MenuContainerComponent;

	public menuCloseAnimationComplete(event: AnimationEvent){
        if (!this.isMenuOpen){
            this.menuContainer.resetMenu();
        }
    }
}
home.component.html
<app-menu-container #menuContainer
                    [@slideInOut]="currentMenuState"
                    (@slideInOut.done)="menuCloseAnimationComplete()"></app-menu-container>
Here we've added a reference to the child component declared in HTML to the code-behind using the ViewChild decorator. This allows us to access functions on that instance of the component and ensure that the logic to reset the menu is encapsulated to the MenuComponent itself.
Using css with Angular conditional class
Angular can also help to trigger css animations by controlling the class's that appear on an HTML element.
Below you can see how we use the NgClass directive to add a conditional class onto the toggle button. When the isMenuOpen boolean from the under-lying component is true, then the .close class is added to the button.
home.component.html
<div class="menu-toggle"
        [ngClass]="{'close': isMenuOpen}"
        (click)="toggleMenu()">
    <div class="bar bar1"></div>
    <div class="bar bar2"></div>
    <div class="bar bar3"></div>
</div>
We then specify in the css that if the .close class is present, then modify each of the bars that make up the hamburger and animate them into a cross. As soon as the .close class is removed, the bars will return back to their normal position.
home.component.scss
.menu-toggle {
    display: inline-block;
    cursor: pointer;

    .bar {
        width: 24px;
        height: 4px;
        background-color: #333;
        margin: 4px 0;
        transition: 0.1s;
    }

    &.close {
        .bar1 {
            -webkit-transform: rotate(-45deg) translate(-6px, 6px);
            transform: rotate(-45deg) translate(-6px, 6px);
        }

        .bar2 {
            opacity: 0;
        }

        .bar3 {
            -webkit-transform: rotate(45deg) translate(-5px, -6px);
            transform: rotate(45deg) translate(-5px, -6px);
        }
    }
}
Using css with Angular properties to trigger animation
The final way we're going to demonstrate how integrate css and angular animations is to bind the values of styles directly to properties on the Component's code-behind.
menu-container.component.ts
export class MenuContainerComponent {
	private readonly _menuWidth = 270;
    private readonly _animationDuration = 300;
	private _menuItemStack: MenuItemModel[] = []; // Each model in the stack represents a menu page
	private _pageListOffset = 0;

	get pageListWidth(): string {
        return this._menuItemStack.length * this._menuWidth + 'px';
    }

    get pageListOffset(): string {
        return this._pageListOffset + 'px';
    }

	private goForward(clickedMenuItem: MenuItemModel): void {
        this._menuItemStack.push(clickedMenuItem);
        this._pageListOffset -= this._menuWidth;
    }

    private goBack(): void {
        this._pageListOffset += this._menuWidth;

    const timeout = this._animationDuration + 10; // Allow some leeway for animation to complete
        setTimeout(() => this._menuItemStack.pop(), timeout);
    }
}
In order to get a smooth scroll between the pages within the menu, each page is held in one big div whose width is adjusted to accommodate all the pages side-by-side and then the div's left property is adjusted to set the container's offset.
menu-container.component.html
<div class="menu-container">
    <div class="pages-list"
         [style.width]="pageListWidth"
         [style.left]="pageListOffset">
        <div class="page" *ngFor="let menuItem of menuItems">
            <app-menu-page [menuItem]="menuItem"
                           (menuMoreClicked)="goForward($event)"
                           (menuBackClicked)="goBack()"></app-menu-page>
        </div>
    </div>
</div>
Full sample code: GitHub
Full sample code: GitHub